The Fence
February 13, 2010, 5:03 pm
Tutorial
tags

Hey guys, as promised I have written a tutorial on how I made my "The Fence" photo. You'll need Photoshop (obviously) and decent Photoshop knowledge to do this tutorial but apart form that it is pretty easy. You'll need this image for the purposes of the tutorial
First up, open up the image in photoshop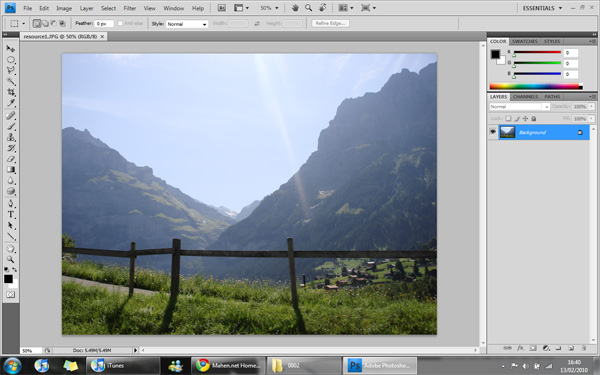
Duplicate the background image, by right clicking on the layer and selecting "Duplicate Layer" from the list.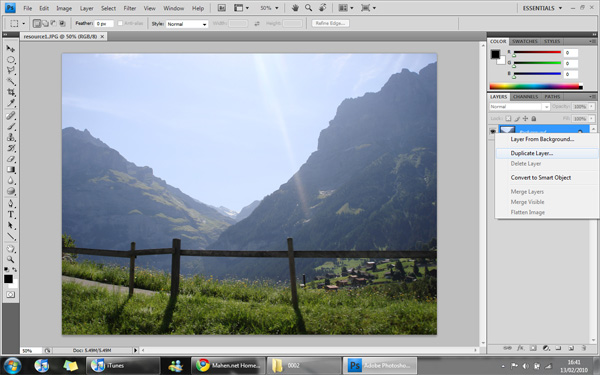
Follow the prompts and name the layer as you wish.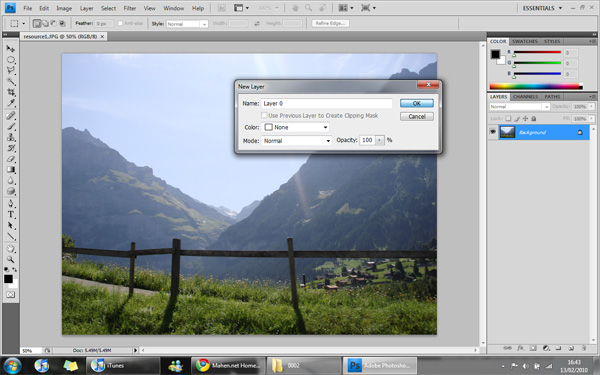
Now the action happens - firstly select the background layer and go to the Menu Bar > Images > Adjustments > Hue/Saturation: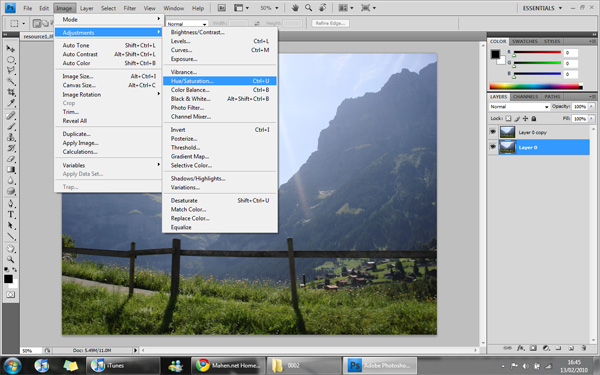
From there we set the Saturation - the middle slide bar - to -100, or as far right as it allows you to. You will not be able to see the effects because the duplicate layer is covering it, but it is essential to the tutorial.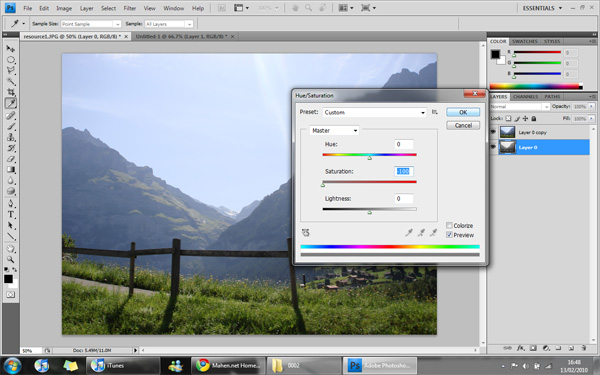
Now select the duplicated layer or "Layer 0 Copy", if you did not change the name when prompted by PS, and navigate to Menu Bar > Images > Adjustments > Curves where a window shall appear.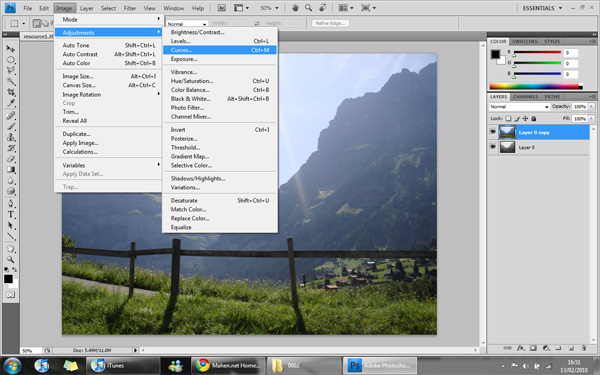
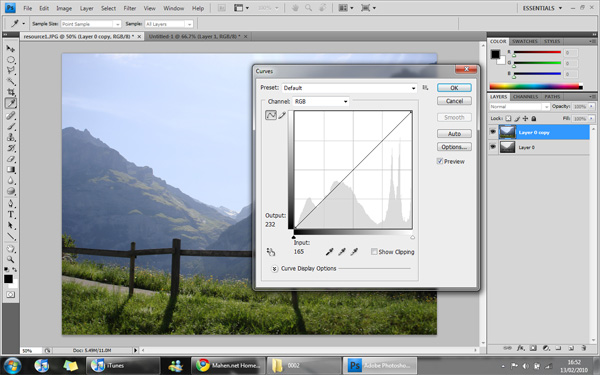
Now pull/shape the curve to design as shown below and hit the OK button.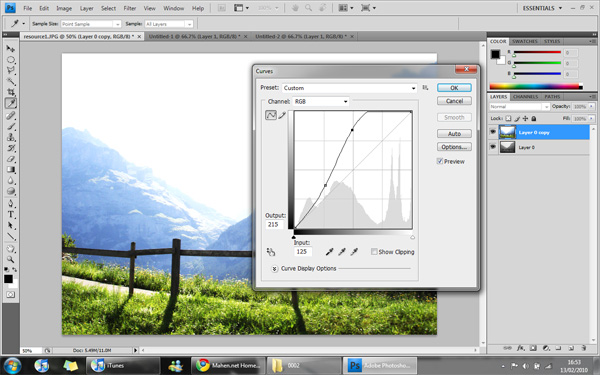
We have now reached the final stages of the tutorial. Right click the duplicated layer, and select "Blending Options" from the menu.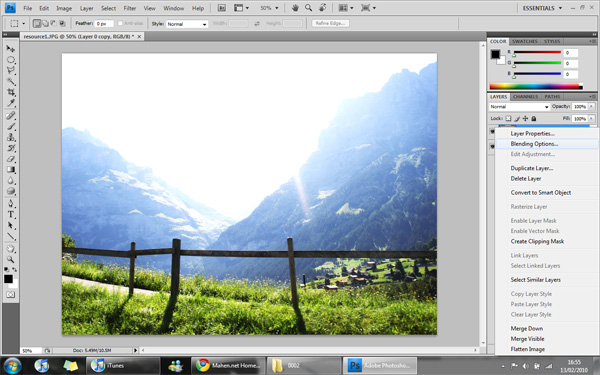
A window shall appear, and we shall stay on the first tab, however you can explore the other effects such as "Gradient Overlay" by ticking the check boxes on the left of the box, but stay with the plan for the moment anyway. Currently the "Blending Options: Default" will be highlighted in blue.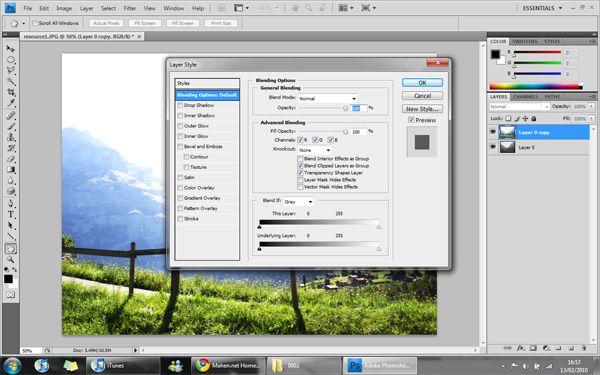
Now click on the drop down menu that displays "Normal" currently, and an array of options will be shown. Select Hard Light, and you will have your finished product, give or take a couple of your own additions.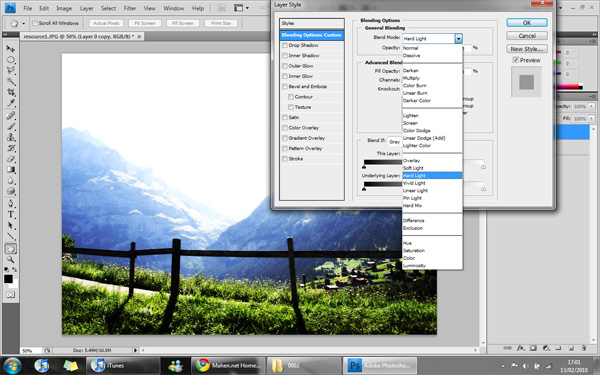
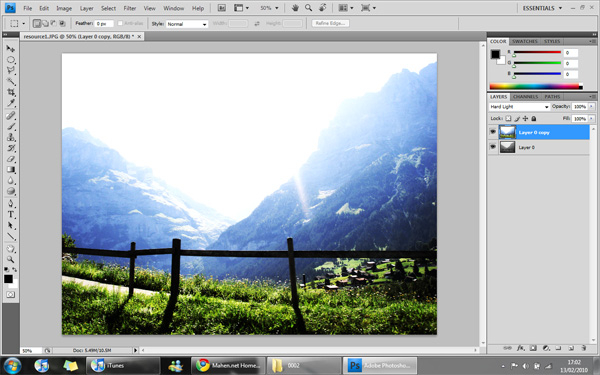
And this is the sight that will meet you: 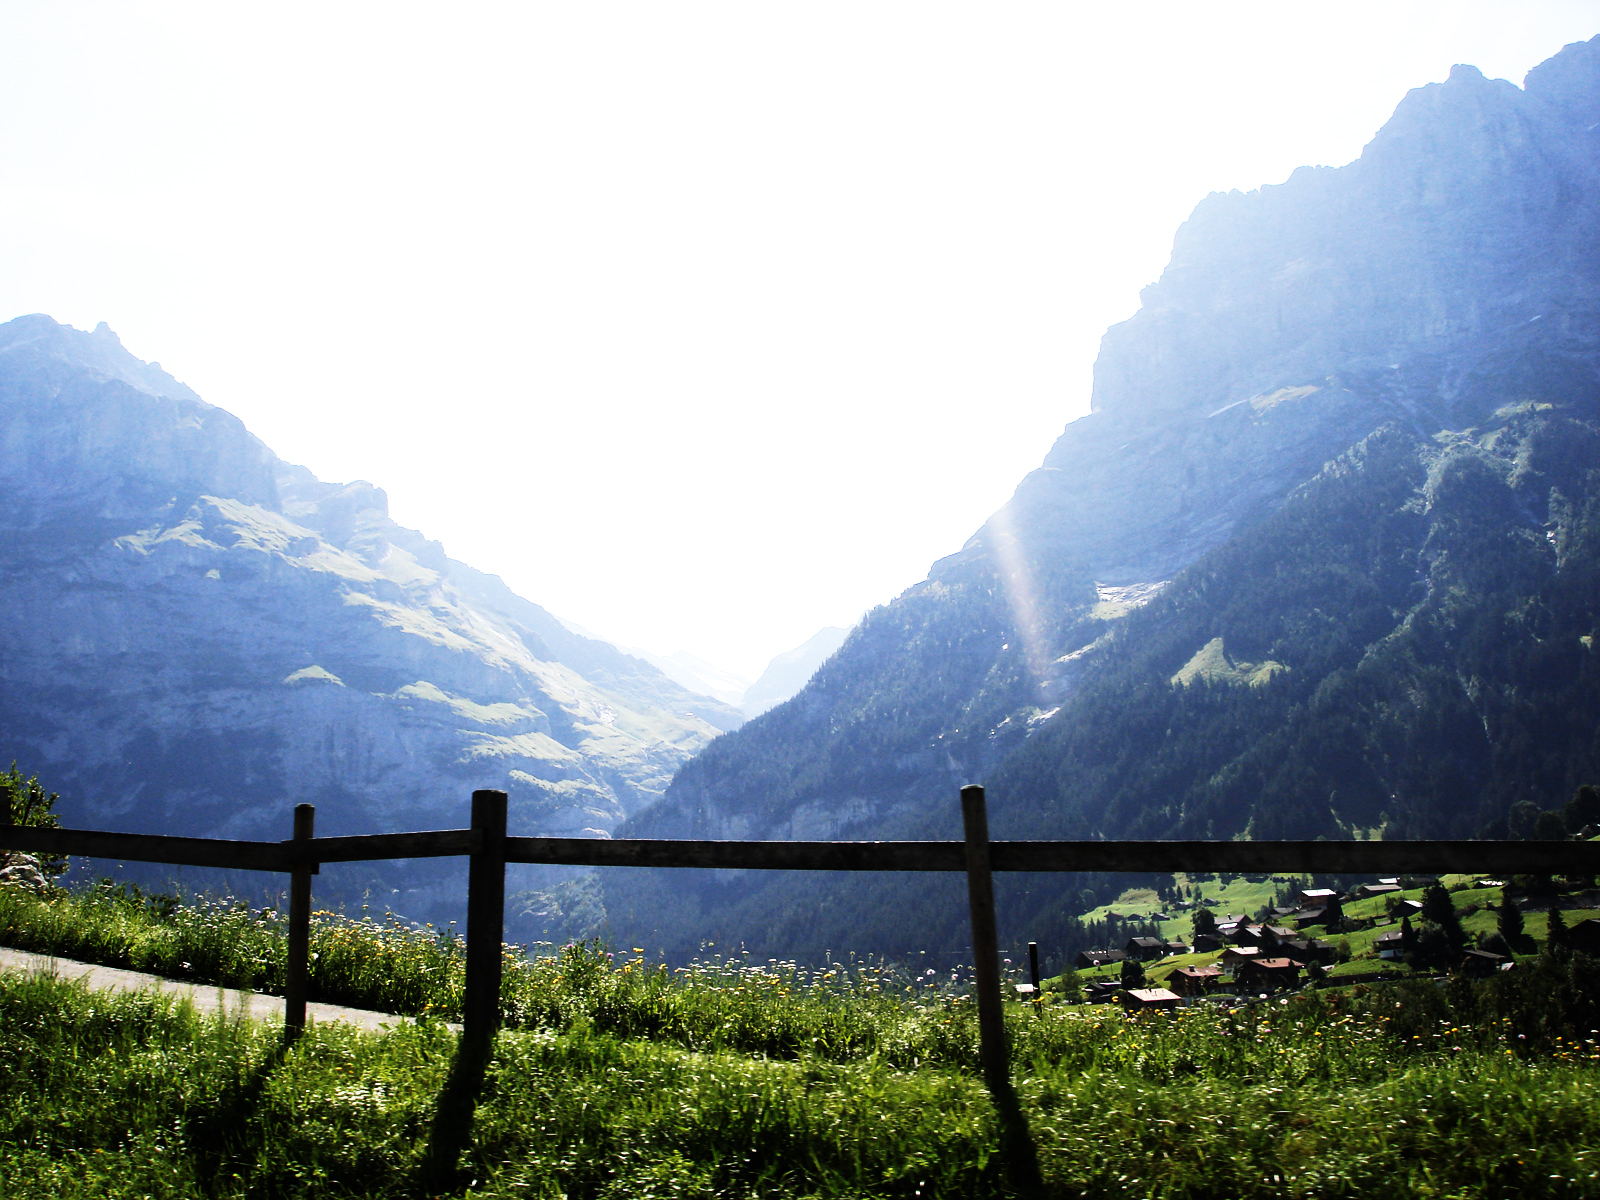
Check out the larger version here